Rice Krispie Treat Recipe is one of the simplest and most loved desserts you can make at home. With just a few basic ingredients, you can create a soft, chewy, and delicious snack that both kids and adults enjoy. This classic no-bake dessert is perfect for parties, quick cravings, or even as a lunchbox treat.
In this detailed guide, you’ll learn how to make perfect rice krispie treats step by step, along with tips to avoid common mistakes. Whether you are a beginner or someone looking to improve your results, this article covers everything you need.
What Are Rice Krispie Treats?
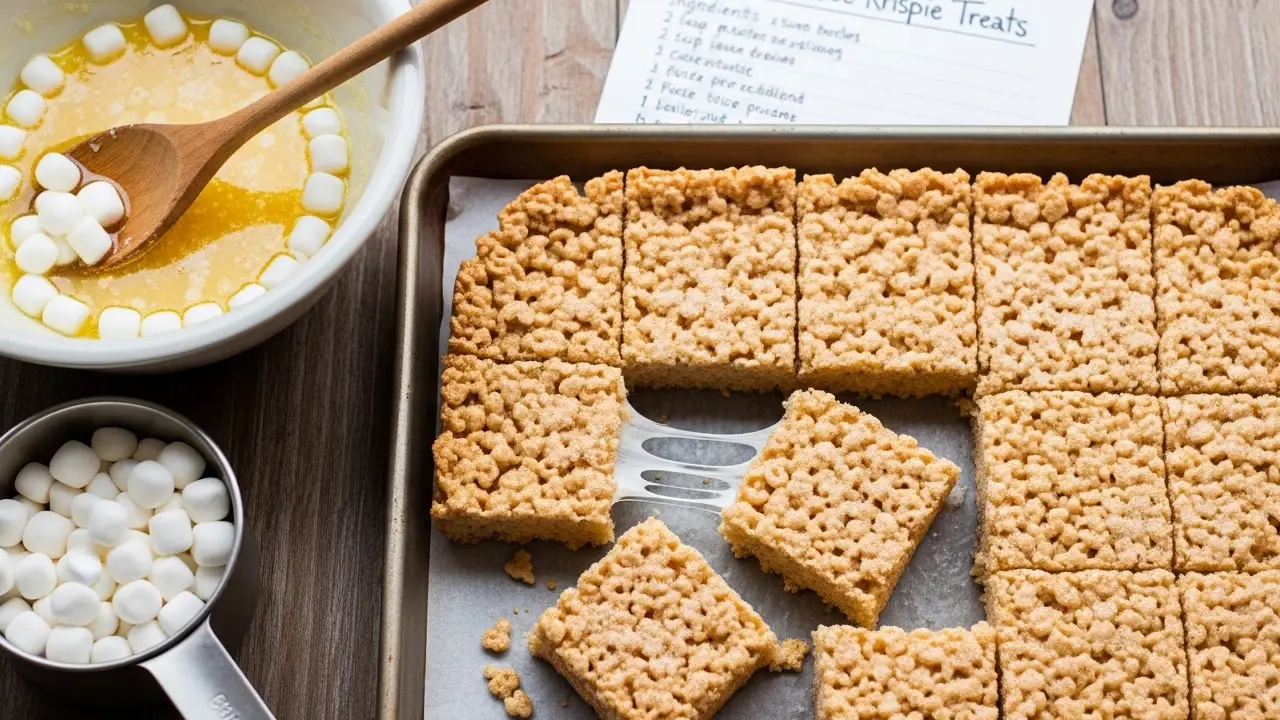
Rice Krispie Treats are a no-bake dessert made using crispy rice cereal, melted marshmallows, and butter. The mixture is pressed into a tray and cut into squares after cooling. The texture is soft, chewy, and slightly crunchy.
This dessert became popular because of its simplicity and quick preparation time. It requires no oven, making it an ideal recipe for beginners or those who want a fast sweet dish.
Ingredients You Need
To make the best rice krispie treat recipe, you only need three main ingredients. However, small variations can enhance flavor and texture.
- 6 cups Rice Krispies cereal
- 4 cups mini marshmallows (or 10 oz regular marshmallows)
- 3 tablespoons butter
- Optional: 1 teaspoon vanilla extract
- Optional: pinch of salt
Using fresh marshmallows is important for soft and gooey results. Older marshmallows can make your treats hard.
Step-by-Step Rice Krispie Treat Recipe
Follow these easy steps to make perfectly chewy and soft treats.
Step 1: Melt the Butter
In a large pan, melt butter on low heat. Avoid high heat as it can burn the butter and affect flavor.
Step 2: Add Marshmallows
Add marshmallows to the melted butter and stir continuously until fully melted and smooth.
Step 3: Mix in Cereal
Remove the pan from heat and quickly add Rice Krispies cereal. Stir gently until evenly coated.
Step 4: Transfer to Pan
Grease a baking tray and transfer the mixture. Press it lightly using a spatula or wax paper.
Step 5: Let It Cool
Allow it to cool at room temperature for about 30 minutes before cutting into squares.
That’s it. Your homemade rice krispie treats are ready to serve.
Pro Tips for Perfect Results
Making this dessert is simple, but small mistakes can affect the texture. Follow these tips for the best outcome.
- Use low heat to prevent hard treats
- Do not overmix after adding cereal
- Press mixture gently, not firmly
- Use fresh marshmallows for softness
- Add a little extra marshmallow for gooey texture
These small adjustments can make a big difference in achieving soft and chewy results.
Creative Variations You Can Try
Once you master the basic rice krispie treat recipe, you can try different variations.
- Chocolate Rice Krispie Treats: Add melted chocolate or cocoa powder
- Peanut Butter Version: Mix in peanut butter with marshmallows
- Fruity Flavor: Add dried fruits or flavored cereal
- Colorful Treats: Use food coloring or sprinkles
- Stuffed Treats: Add caramel or chocolate layers
These variations make the recipe more exciting and suitable for different occasions.
Common Mistakes to Avoid
Even though the recipe is easy, people often make a few common mistakes.
- Using high heat which hardens the treats
- Over-pressing the mixture in the tray
- Not greasing the pan properly
- Using stale marshmallows
- Letting the mixture cool before shaping
Avoiding these mistakes will help you get soft, chewy, and perfectly textured treats every time.
Storage and Shelf Life
Rice Krispie treats can be stored easily if handled properly.
Keep them in an airtight container at room temperature for up to 3 days. Avoid refrigerating, as it can make them hard. If needed, you can wrap individual squares for longer freshness.
For best taste and texture, consume them fresh within the first 24 hours.
Nutritional Information (Approximate)
| Nutrient | Amount per Serving |
|---|---|
| Calories | 150-180 kcal |
| Carbohydrates | 25g |
| Sugar | 15g |
| Fat | 5g |
| Protein | 1g |
Why This Recipe Works
This rice krispie treat recipe works because of the balance between marshmallow and cereal. The melted marshmallow binds everything together while butter adds richness and softness.
Using the right heat and proportions ensures that the treats remain chewy instead of becoming hard or dry.
Frequently Asked Questions (FAQs)
1. Why are my rice krispie treats hard?
They become hard if you use high heat or press the mixture too firmly into the pan.
2. Can I use large marshmallows instead of mini?
Yes, both work fine. Just make sure they are fresh for best results.
3. How do I keep them soft for longer?
Store them in an airtight container and avoid refrigeration.
4. Can I add chocolate chips?
Yes, but add them after the mixture cools slightly to prevent melting.
5. Can I make this recipe vegan?
Yes, use vegan marshmallows and plant-based butter alternatives.
Final Thoughts
This easy rice krispie treat recipe is a perfect choice for anyone looking for a quick and delicious dessert. It requires minimal ingredients, no baking, and delivers consistent results when done correctly.
By following the steps and tips in this guide, you can make soft, chewy, and flavorful treats every time. Whether you keep it classic or try creative variations, this recipe is always a reliable option.